Monday, February 15, 2010

The House Around the Corner - Kefir

Note from Cindy:  If you have a way to drink kefir, we would all appreciate your sharing of that information.  Jamie has added a cool way to drink it, but if you can make a comment with your recipe, it would be great.  Maybe Apryle will share her smoothie recipe that she used it in.  It is yummy. I don't want to say kefir is gross, just a really new flavor and texture.  Any helpful tips are appreciated.  I changed the settings so you can do an anonymous log in and post.  If anyone leaves something weird, I will just delete it.... but why would they  :)  I can then gather them into a top ten ways to add kefir to your life or something like that.
 
Jamie's Kefir Recipe

My kefir grains arrived by mail, sealed in a double plastic bag and shipped in a plastic bubble envelope. Not very impressive are they?  These grains were shipped with a little milk added to feed them during their trip and when you first open the sealed bags you'll notice a sour, yeasty odor, don't panic, that's normal.


 The first thing you want to do is clean your grains. This is really easy. First take a sieve and dump them in, if you have trouble getting them out of the bag just pour a little milk in to loosen things up. After you've gotten the little grains out of the bag you want to pour a little milk or distilled water over them while gently shaking the sieve.


This is what they look like once they're all cleaned up.


 Now you simply dump them into a clean jar, the one shown is quart size.


Another picture of the clean grains.

 Here you'll see that I've added two cups of whole milk. Ideally you would want to use raw milk, but since it's unavailable in my area I've used organic whole milk instead.


You want to cover the jar with a cloth, you can't seal it up tight, kefir needs to breathe. Notice my high-tech dishcloth and rubber band combo, it worked great!


 Kefir actually likes to be disturbed so I would give the jar a little shake everytime I walked through the kitchen. It's quite cool in my house so it took almost two whole days for my first batch to culture.


Here it is, almost two days later, ready to strain. Notice the streaking on the jar.


It will be quite thick at first, you'll think you messed up. You didn't.


You'll need your sieve, large bowl or measuring cup and a wooden spoon now. Place the sieve over the bowl, dump in the cultured kefir and you might have to stir gently with the wooden spoon but eventually all the kefir will strain through leaving only the grains, which have multiplied! Wow, busy little critters.


Here is the strained kefir, lousy picture, I know.


Here are the kefir grains that have increased in numbers by almost half!!


Here is my second batch of kefir set up and ready to culture again.


The finished product! If you haven't followed the baby steps to cultured foods I would recommend you start slow, just a couple tablespoons at first.  For a great breakfast drink blend one cup chilled kefir with blueberries and some honey, it's wonderful!

Directions for Raw Cultured Butter

If you are interested in reading about the beginning of my raw milk adventure, go here.


So, step one... acquire some raw cream.  I got mine at the Whole Foods Depot for $10.65.

Step two..  put it into a glass jar and mix it with some cultured milk... I used creme fraiche ($5.79) to culture mine.  Leave it on the counter.  I left mine out for about 12 hours.  I don't know if that is how long your are supposed to leave it out.  If I ever find out, I will let you know.  You can also use buttermilk from a previous batch of butter.

Step three.. pour through a strainer and the clumps of stuff go into a small jar, along with some of the cultured cream.  Label it.  This is your starter for next time so you don't need to buy the creme fraiche again.  I think if you leave it out longer, you end up with a clabbered cream, which is creme fraiche.

Step four... put the cream into the fridge and get cold.  You might also want to refrigerate or freeze your kitchenaid bowl and your wire whisk.

Step five... put the cream into the bowl and it is just like making whipped cream.  It took less than four minutes for mine.  It passes the stiff peak phase and moves right into the really, really stiff phase and suddenly - BAM - you have butter.  Just like a miracle.

Step six...  I don't know if this is the right way, but I just poured mine into the wire mesh strainer over a bowl and let the buttermilk drain out.  Then I bottled up the buttermilk and eventually used it to culture a loaf of bread.  It was so good.

Step seven... wash the butter.  VERY important.  I need to find a better way, but I used my wooden bowl and just used running water and kneaded and turned it until the water ran clear.

**Changing this a little bit.  I forgot something... so sorry.  I put my butter back into the mixer and added about 1 tsp of sea salt.  This is for preservation and for flavor.  THEN move on to...

Step eight...  If you want to mold it into pretty shapes.... this is the time.

Step nine.... ENJOY!

Note:  I just kept a little on the counter in my butter dish at a time.  Then it was soft for use, but the bulk of it I kept in the fridge in a glass jar.   Some of it I mixed half and half with my organic, but not raw or cultured, butter.  I try to just have enough out for the day.  I like to put some into my little butter crock at night and try to estimate how much I will need for the next morning.  Remember, if it sours, it is still healthy and good... just sour.  Disguise it in something:)

Sunday, February 14, 2010

Rambling through the Woods - Upcoming week and Site Changes

Good morning to all,

I hope your day is blessed, active, happy and full of worship, family and fun.  Sunday is probably my favorite day of the week.  I love Sunday's.  We go early to do latte's and love the time of worship and being able to spend a little more time visiting and talking.  After church, we have a pot luck.  It is always a happy, busy, chaotic, joyful time.

I always think it is the best part of the week to come together for worship and the word in a community.  No matter where you are, you should go be with your community of faith on Sunday.   We were created to worship God, and to come together in Spirit and Truth (worship and word). Join your community of believers for healing, life, balance, growth, joy and a wonderful time of reconnection!

So, this week it is my plan to focus on milk and milk products.  I am looking for input on how you use it, ways to prepare it, and what we can learn.  We have made the switch to raw milk at our house and we are trying to learn to like kefir just like milk.  It has a different taste and texture, but is not bad.  I am bringing some to church to see how it works in latte's.  Experiment in progress.
So, I would like to give a total opinion here..... If you are in your childbearing years, or thinking about ever having a baby, or are pregnant, or are thinking about becoming pregnant...... find a way to switch to organic, grass fed, raw milk and milk products. You do need to learn how to deal with them. I have been culturing mine for two reasons.... preservation and gut health.

This is guys and girls. Get your reproductive parts working as well as possible, and keep them working. Raw, organic, grass-fed milk and milk products would be one of the top changes I would make if I were in those years.
 The main reason.... take responsibility YOURSELF for giving your children the best possible opportunity to be healthy and well. Do NOT subcontract it out to your doctor, your mother, your chiropractor, your best friend..... all of these are good resources, but you should do your own due diligence on this, one of the most important things anyone can do.
Give your body the best possible chance for a health and energetic pregnancy. Do some research and spend some time thinking about this. The book I am reading is "Healing our Children". You can read portions of it on line.

As for this upcoming week, I have been going through all of the posts and adding a "Path to Progress" on the bottom of the Basic Plan pages to give some direction for new users.  As I have been going through I have found links that don't work :( and a couple of opinion pages that needed changed.  I am hoping to get these updated this week.  I am about half way through the process.  This has been a steep learning curve for me... but I kind of like steep learning curves :)  If you find something that does not work or does not make sense, could someone let me know?

Also, I would love to post some of your ideas, recipes and pictures on milk and milk products.  I have pictures and a story ready on raw, cultured butter and will probably put it on later today or tonight.  If you have tried something, or are planning to try something, can you take pictures, write out how it went and share it with all of us.  Jamie has sent me a great series on kefir, and I think she plans to try making some cream cheese desserts and letting us know how they went.

There are still quite a few recipes I need to add on sourdough, so that will continue.  Becky is working on the sourdough cinnamon roll recipe with cultured cream cheese topping.  She is planning to bring some to the class on Tuesday.  YUM - take pictures Becky :)

I am working right now on the top ten reasons to switch to raw, grass fed milk.  It should go up tonight.  Right now... the bread is out of the oven, the soup is bubbling, the boys are ready.... Time for me to go. 

Be blessed, healthy and well,
Cindy

Saturday, February 13, 2010

The House Around the Corner - Food, Inc.

OUR FOOD: WHERE IT COMES FROM  
By Anthony 
This article has been inspired by the move “Food, Inc”
 
Normally we take for granted where our food comes from. We simply go and buy healthy food with hard earned money and eat it, right? That is not the case! People don’t care where their food comes from. They simply want fast food to eat. So they go through the “work, buy, eat” method, but also don’t check the ingredients or where it came from simply because they trust the food industry.

I am, like many people, a BIG fan of the hamburger, but I had no idea that it can be the reason of death by E.coli 057:H7. I would much rather have a real, grass-fed beef burger than have a burger that could kill me. I learned that 90% of American meat plants are controlled by FOUR companies. It is also more money to buy vegetables, than it is to buy junk food or in other words snack foods. It’s the same thing with veggies and fast foods, where the veggies cost more money than fast food.

Now E.coli has not received as much attention as it needs. There have been 21 E.coli outbreaks in 16 states linked to National Steak and Poultry meats in the last 20 years. However the FDA does not have the power to shut them down. Feedlot cows are raised ankle deep in their manure and fed corn which causes E.coli to spread quickly. If cows were fed grass for five days 80% of the E.coli would go away!!! The food companies tried to shut down a man who is feeding cows grass NOT CORN!!! 

The farmer I mentioned does not feed his chickens corn, so they don’t get fatter faster. A microbiology lab even tested his chickens against chicken from the supermarket, and his were significantly cleaner. This happens because the meat industry feeds their chickens corn, give them antibiotics, keeps in the dark, and make it so the chickens cannot keep up with their growth process. 

 Where does our food come from? Well now that we know about the food I will tell you where it comes from. The answer is FACTORIES!!! Not farms but big assembly lines in  factories. The cows are raised on huge, overcrowded lots, with no grass and unnaturally fed CORN!!! So, now that you have learned interesting facts about food I encourage you to help make a difference in the way our food is raised, butchered, and prepared. 

Ways to make a change: plant a garden, buy food grown locally, go to farmers markets, cook a meal and eat it with your family, ask your burger if it has been fed corn {JUST KIDDING!!!} in other words, buy grass fed beef.

By Anthony   5th grade                                      
2/10/10

Friday, February 12, 2010

The House Around the Corner - Jamie's Bread


Jamie's Sourdough Bread

My recipe is pretty darn basic, it can easily be modified to suit anyone’s tastes. A few things you should know beforehand, sourdough starters come in all sorts of different consistencies and aromas, ranging in color from a creamy white to deep yellow. Mine is a wild yeast starter that I’ve had for quite awhile now. It works great but I prefer a slow rise to my bread, for someone who doesn’t have the time to take a couple days to make bread you would probably want to use a starter that began with commercial yeast.

Here’s what you need:
  • Five to six cups of flour, any combination as long as there is two cups of white flour in the equation. For this batch I used white, oat and rye.
  • One to two tbs salt, depends upon your preferences.
  • Two to three tbs of oil, I use lard, it is just my preference, use whatever you prefer.
  • One cup starter or for regular bread you would want to dissolve 1 tbs commercial yeast in ¼ cup warm water.
  • Two cups plain kefir. After you pour the kefir in the bowl fill the same cup with cold water, you’ll probably need it.
If you have a stand mixer, put everything in the bowl and using the dough hook and lowest speed, mix it up. As the dough starts to come together you may have to add a little of the cold water. You don’t want it too wet but you don’t want it crumbly either, just watch the bowl and when the dough starts clinging to the hook and the sides of the bowl are clean, no signs of flour or liquid, turn it off and grease a large bowl. You can use whatever you’d like, I use either butter or lard. Plop the dough in the bowl and flip it at least once, you want to coat the ball of dough, cover it with a dishtowel and walk away.


If you are making this bread by hand you want to put all the dry ingredients in the bowl and mix them all together. Make a well in the center and add all the wet ingredients (except the two cups of water). Start mixing, you can use your hands, a spoon, a rice paddle, whatever it takes to get the job done. Add the cold water as necessary to get the dough to hold together without it being too wet. Once it gets to the right consistency, or when you get sick and tired of mixing, whichever comes first, follow the same directions as above, plop that dough into a greased bowl, cover it and walk away.
 
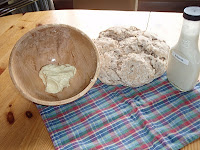
Here it is, all ready to be tucked away in the corner to rise.


Now, if you used a commercial yeast or if you have a “fast” starter it will only take a couple hours for the dough to double in size, if you’re like me and you have a slow starter it’s going to be somewhere between 12 to 18 hours for the first rise, the batch in the photo took 18 hours. I can see the looks on your faces now, SHE CAN’T BE SERIOUS, 18 HOURS? Yep, I’m serious, when I say a couple days to make bread, I’m not kidding. Think of it as culturing the dough.

 Once the dough is through the first rise and is double in size you want to punch it down, pull it all together into a ball an plop it out onto a floured surface. Now you start kneading (push, pull, quarter turn) keep at it until you have this wonderful mass of silky, soft dough. Cover it with a dishtowel and take a break, give the dough 15 to 20 minutes to rest.
 
Once the dough has rested, divide it and shape it, you can use bread pans, or make long loaves, round loaves, individual rolls, whatever you prefer, it’s your bread. Cover the shaped dough with a dishtowel and once again, walk away.
Again, if you have a fast starter, it will only take a couple hours at the most for the second rise, for this batch of bread the second rise took seven hours.


Here it is, seven hours later, ready to go in the oven.


You want to bake the loaves at approximately 350 degrees for 30 - 35 minutes. I say approximately because my stove is ancient and most of the numbers are worn off the dial, but I’m almost positive it’s set at 350 degrees.


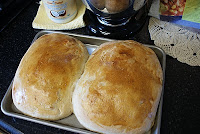
Fresh out of the oven! 

This recipe passed the husband taste test, it has a wonderful texture and just a little hint of tanginess from the kefir.

Ramble in the Woods - Friends and Bread


Make new friends
But keep the old
One is silver
The other Gold...

One of the nicest things about Facebook has been reconnecting with old friends.  Three of us spent so much time together in high school, Jamie, Sherri and I, best of friends.  Then we graduated, got married, had kids, moved around, worked, worked and worked some more, grew and learned and lived and loved.  Life flowed by us like a river and before we knew it..... thirty years had flowed by us..... and we had completely lost touch.

Through the simplicity of Facebook, Sherri, Jamie and I have reconnected.  We still haven't seen each other, but it has been so sweet to remember why we were such good friends all those years ago.  We have been catching up on kids, pets, gardens, houses, hubbies, families and old memories.  When I started this blog, they have been actively cheering me on..... and providing practical help.

So... Jamie has sent me her bread recipe, and took pictures of the entire step.  She is a clear and concise writer and covers everything well.  A complete novice can learn from her and I am grateful for her time and energy.  I think we are going to see Sherri's recipe soon :)  :)  :)

I am also so blessed by my younger friends.  Your energy, passion and enthusiasm is infectious.  You are so willing to try new things, figure it out, make it better.... then share it so we can all benefit.  This internet adventure has been beyond anything I could anticipate a couple of months.  I look forward to every morning... what new thing is coming my way today?  What old skill is going to be shared?

I think I am going to have to completely change my recipe after reading through all of the great recipes, ideas and discoveries.  I think I have gotten at least two good ideas from each recipe here.  I am looking forward to more ideas every day.

Thanks for sharing this journey.  The picture is from Christmas... everyone brought their "toys" and had a blast riding and eating and playing marshmallow wars and running and just being a family.  It is such a happy memory that I wanted to share.

Be Blessed, healthy and well
Cindy

Thursday, February 11, 2010

The Care and Feeding of a Sourdough Starter


THE SUM TOTAL OF MY STARTER KNOWLEDGE

I am doing some prep work on a sourdough bread class, and found a couple of really good web sites on sourdough starter...  how to make one, how to feed one, and things to watch for.  I thought I might share these sites with you, along with my total knowledge of starters, which is not much.

This is the thrift store crock that I keep my starter in.  
If I put it in the fridge, I use a a glass jar.

  • It is simple to keep a starter alive.  
  • Both getting a starter from a friend and making your own are effective.
  • Some sourdough breads call for dry yeast - you can probably omit that step if you add in a 12 hour "rise" - the sourdough just takes longer.  That is fine if you are doing the entire "slow foods" type of meals.
  • You shouldn't use reactive metals around sourdough starter.  Use wood, glass or ceramic (I am NOT going to recommend plastic for obvious reasons).
  • If you use your sourdough 2-3 times a week, you can leave it on the counter and just feed it every day or two.
  • If you are not going to use it for a couple of days you should put it in the fridge.
  • If it gets a black "liquid" on top, that is normal.  Just stir it in or pour it off - your choice.
  • Add equal parts (by weight) of flour and water to feed your starter (about 3/4 cup of water to each cup of starter)
  • Lumps are OK.
  • If you have too much starter and you are not ready to make bread - make pancakes or waffles or bottle some up to share with a friend.
  • If you have starter with one type of flour and you want to switch to another type of flour..... just go ahead.  Within a couple of "feedings" your starter is converted.
  • I keep a "white" starter in the back of my fridge for my friend.  I feed it a couple of times per month. 
  • I keep a "whole wheat" starter in the back of my fridge for emergencies - a couple of times a month I stir it into my current starter.... then bottle some back up the next day.
  • You need to feed your starter more when it is warm.  In the summer I feed it more often - but we don't do A/C and we do wood heat - I don't put the starter by the stove so it stays cooler and is a little happier.
  • If I leave my starter on the counter too long and forget to feed it... it gets disgusting stuff on the top.  I usually just skim off the yucky stuff and feed the starter a little bit twice a day until it looks good again.  If it is worse than even I can stomach, I pull my "emergency" starter out and start again.
  • I like to label my starter (and everything else).  My fridge is starting to look like a science fair.
  • Have fun and don't stress too much.  Properly developed sourdough starters are pretty resilient and don't require too much from you.  It is kind of like a low maintenance pet....a little more work than a pet rock and a little less than a fish.
Enjoy
Cindy
This is my active starter
I have a lot going so I can share at the class.


Some appropriate Links:
Breadtopia - Sourdough Starter Management
Wild Yeast Blog - English Muffin Recipe I am going to try.
Sprouted Flour Recipes and Ideas

Let me know how your bread turns out!  If you come up with a great recipe, we would all love for you to share it with us.  Pictures are great.  Be healthy and well.


The House Around the Corner - Bobbi Jo - Starter

Sourdough Starter Recipe:
2 cups whole wheat flour
2 t. sugar
2 1/4 t. active-dry yeast
2 cups warm water
Mix the flour, sugar, and yeast in a clean, 2 qt. capacity glass bowl.
Gradually stir in the water and mix until it forms a thick paste and do not worry about lumps. Cover with a dish cloth such as this one from Evelyn Fields
and let sit in a warm, draft free place.
Once the starter is bubbling, feed it daily with flour and water while removing a cup of starter. You're just replacing it. I have been using 1 cup of flour and 1/2 cup water... still working on this one though.

The House Around the Corner - Bobbi Jo - Sourdough


A HEAVENLY LOAF - FROM JO'S PRAIRIE 

I have been experimenting with making sourdough bread lately and think I've found a recipe that works for us:) Here it is for those of you who were wondering.  I have to say thank you to Heather, at Mountain Home Quilts for her inspiration to start making our own bread. Check out her Etsy shop for beautiful quilts!

(If you would like to see this in it's original form, go to Jo's Prairie here.)

Bobbi Jo's Prairie Bread Recipe:

2 1/2 c whole wheat flour
3 c. white bread flour
2 1/2 t sea salt
2 1/2 t dry yeast
1 c. warm milk
2 T agave nectar
2 T butter, softened
1/2 c warm water
1 1/4 c. sourdough starter
1 egg

From a previous post:  Homemade bread has become a favorite in the this house.  The boys helped me knead whole wheat bread this afternoon and had a great time. I tried out Red Mill's ground flaxseed to make more of a "sandwhich" bread. Substituting a half cup flaxseed meal for a half cup of whole wheat seemed to be a perfect recipe:)

Directions for Bread:
In a large bowl, combine 1 c. whole wheat flour, 1 c. bread flour, salt, and yeast. Stir in milk and butter. Add starter, agave, and water. Gradually mix in the rest of the flours ( 2 c. bread flour and 1 1/2 c. whole wheat flour.

Turn dough onto clean, floured surface and knead for 8-10 minutes. Place a greased bowl and cover with damp dish cloth. *I like to use coconut oil to grease my bowls. Use your fingers to rub it on- if you have excess, just use as a hand lotion:)  Let rise for one hour in a warm place.
This is a picture of the end of this rising process. It should double in size.

Punch down your dough and let rest for 15 minutes. Shape into loaves. Place on greased baking sheet (above picture). Let rise 1 hour. I warmed my oven today for this process and let it rise in the oven. It worked much better! Just turn the oven on low and then turn it off- you should be able to touch the inside of the oven.  Brush tops with egg wash (1 egg, beaten) and bake at 375 degrees for 30 minutes. *I use my finger to brush the egg on.  Here they are... ready for the oven!

Baker, Baker, Bread Maker!
It's very rewarding to see my son light up when "his" bread comes out of the oven.
He is so proud of himself and really enjoys that first taste test:)
Thank you, Bobbi Jo, for sharing this with everyone.  I plan to add some flax meal to my bread.  I can't wait to see what it does to the recipe I have.  I also think I will try the egg wash.  It gives it a beautiful color.  I can just SMELL it from here :)  Cindy

Wednesday, February 10, 2010

The House Around the Corner - Evelyn Fields

Melissa has been learning a lot of "old" new skills.  Sourdough bread is just one of them.  She has a lot of interesting ideas on saving money, sewing, attempting to live a life without plastic, running a small business from home and other great ideas.  If you are interested in reading her blog, go to Evelyn Fields
  
Melissa's Sourdough Whole Wheat Bread
  • 2.5 cups whole wheat flour
  • 1 cup sourdough starter
  • 3/4 tablespoon kosher salt (or 1 teaspoon table salt)
  • 1 1/2 cups warm water
  • Covered pot (five-quart or larger cast iron, Pyrex, ceramic, enamel…something that can go into a 450F oven.)
  • Sprouted Wheat Flour, if you choose.  This should be done ahead of time.  Sprouted Grain Directions
I have been experimenting with making bread with sprouted whole wheat.  I love bread but my body doesn't and I think sprouting it helps me digest it better.  It is one more process that is easy to do.. It does take a few days and you need a wheat grinder.

1. Mix dough: The day before, combine all ingredients in a big bowl with a wooden spoon until the dough just comes together. Cover with wet cloth and let sit 20-24 hours on the countertop or in the oven with the oven light on if your house is cool.

2. Shape and preheat: Dump the dough on a floured surface. Fold ends of dough over a few times with the spatula and nudge it into a ball shape. Generously dust a cotton towel (not terrycloth) with flour and set dough in it.  Fold towel over the dough. Let it nap for 2 hours or a lot longer to rise more. To know when it is done rising poke your finger into the dough, when it stops springing back from the hole you made... it it ready.


3. Bake: Pre heat oven to 450 and place empty pot in oven for 1/2 hour. Remove hot pot from oven.  Holding towel, dump wobbly dough into pot. Doesn’t matter which way it lands. Turn down oven to 400 and bake covered for 30 minutes. Uncover, bake another 15-20 minutes or until the crust is beautifully golden and the middle of the loaf is 210F. Remove and let cool on wired rack.


I made Sprouted Sourdough Rye Bread for the first time last night. It has a strong taste so it took me a few bites to start liking it but my husband LOVED it!!!


Making bread usually involves some type or rising, double rising or soaking overnight and a towel is needed to keep unwanted things off and moisture in. I have been using whatever towel I had around for covering the dough and sometimes wondered about lint on it or what I had used it for before it was washed. So I made a towel that is just for rising bread, with a cute little slice of "sprouted" bread on it.  This way it only has one purpose.  Also it looks cuter than my old/stained towels sitting out all day or night on my counter.  These new towels will be in my shop soon. 

My Sourdough Bread Recipe


I have been making sourdough bread for a while now.  Here is a recipe and some tips that have been helpful and I would like to share them with you.  I am also going to do several other recipes from some of the terrific bakers who have been working their recipes out!


SOURDOUGH BREAD

Don't forget to save some starter for the next batch - add another 2 cups of flour and 1-1/2 cups of warm water to feed it.
1 cup starter
6 cups flour**
2 Tablespoons sesame seeds
1 Tablespoon salt
1 Tablespoon sweetner
3 Tablespoons Olive Oil
2 cups warm water

These are approximate measurements.

** Currently I am using:
  • 2 cups organic, fresh ground whole wheat flour.
  • 2 cups organic, fresh ground barley flour.
  • 2 cups organic white flour
 The white flour gives the bread  a nice rise to it.  We could live without it, but at this time, I just add it.  Otherwise, it is a really, really dense loaf.  Nothing wrong with that, just at this time, I add the white - It makes it easier for sandwiches.

This makes a somewhat sticky dough that I just bring together in my Kitchenaid.  I add flour later if necessary to firm it up.  I dump the sticky dough into a glass or ceramic bowl.

Cover with a dishtowel (you can flour it up heavily so the bread does not stick to it) and leave to rise for several hours.  The cute one is from Evelyn Fields.  She has done a lot on the whole bread thing.... look at her site.  I'll list her recipe also as a different post.
I have been trying a damp towel also (trying to replace the plastic wrap I used to use).  I have to re-dampen it a couple of times while it is rising.  If I forget or it is overnight, I end up with a dry towel and a crust on my dough.  I just pat some water on the towel and let it sit for a couple of minutes, then the towel comes right off.  I then knead the crusty part right into the dough and it rehydrates it nicely.
When your dough has doubled in size, pour or scrape onto a counter that has some flour sprinkled on it.  Knead it to a nice consistency.  Add more flour here if necessary.  Shape into round loafs put on parchment paper or your baking pan and recover with the towel.

So far, if you have the ingredients, this just takes a few minutes, twice.

Let your dough rise again - it usually takes about an hour.  Heat the oven.  I keep messing with the temperature and time and right now am doing a long, slow bake (unless I am in a hurry - then I do 400 degrees for 25 minutes)  ...so I usually go with 325 degrees for about 40 minutes....  I also like to put a pan of water on the bottom of the oven for moisture.

When I think it is done, I pull it out, turn it over and tap the bottom.  A hollow sound indicates that it is done!

A couple of final tips.... I like to put butter on the top when I pull it out - this makes it easier to cut later.  Alternatively, you can run your hot bread under water very quickly and it should do the same thing.  I like the butter better :)  Here is my butter experiment - it was yummy - organic, raw, cultured, grass-fed butter and buttermilk. (coming soon)

Also, I am trying to avoid plastic and am getting some cloth bread bags from a friend.  You can see her bags here:   Evelyn Fields

Be patient... if it doesn't work out at first, keep trying.  It really just is a skill you need to develop.... Everyone seems to come up with their own recipe and way of doing things that works for them.  If you just keep at it,  you will know how YOUR family likes it.

Enjoy
Cindy